iPhone中的基于位置服务开发的应用其实挺多的。
但是那种能显示密集型周边的信息或者说是资料数据的应用,
还真不知道是通过的是类似于webService还是内置类似于地图导航功能的数据包。
但是对于简单如何上手这方面的开始,我们还是要接触下的。
总的来说,我们这类应用的会涉及到核心的两块内容。
1.位置定位(最简单就是当前应用所有者所持设备的地理位置),主要用到的API类 CLLicationManager。
在其他比如(Android位置类开发),我们知道实现定位的方式有gprs,网络,蜂窝式,基站等。并且是可以通过自己选的。
ios中就却直接hide或者说是简单化了这种定位方式。
只需我们设置一些参数后,系统自动会做出最切当的反应。
2.位置确定了,那么下一步就是显示给用户了。显示的视图,这边用到API类MapKit。
比如我们定位了一个经度 30.002,纬度为199.232.最简单的,我们直接在提供的视图上定位到这个点。
但是我们知道,更多的时候,我们希望显示这个点的更多数据信息(比如街道,XXX路),更甚至是周边的。
这个就需要庞大的数据包支持了,因为我没做过这方面的,只是简单知道可以通过google公开的一个web端接口获取数据。
一:首先简单介绍下CLLicationManager类的常用
开启定位服务:
self.locationManager = [[CLLocationManager alloc]init];
    if (![CLLocationManager locationServicesEnabled]) {
        NSLog(@"定位不可用~");

    }else {
        //设置代理
        [self.locationManager setDelegate:self];
        //设置精准度,
        [self.locationManager setDesiredAccuracy:kCLLocationAccuracyBest];
        [self.locationManager startUpdatingLocation];
    }
初始化了位置管理器,判断设备的定位功能是否开启开启的话设置代理,精度等参数后,开始服务。
实现代理类方法,获取返回参数:
#pragma mark-
#pragma locationManagerDelegate methods
- (void)locationManager:(CLLocationManager *)manager
	didUpdateToLocation:(CLLocation *)newLocation
           fromLocation:(CLLocation *)oldLocation
{
    self.coordinate = [newLocation coordinate];
    self.altitude = [newLocation altitude];
    NSString *lat = [[NSString alloc] initWithFormat:@"%f",self.coordinate.latitude];
    NSString *lon = [[NSString alloc] initWithFormat:@"%f",self.coordinate.longitude];
    NSString *alt = [[NSString alloc] initWithFormat:@"%f",self.altitude];

    //更新定位信息方法
    NSLog(@"delegate %f,%f",self.coordinate.latitude,self.coordinate.longitude);
    self.latitudeText.text = lat;
    self.longitudeText.text = lon;
    self.altitudeText.text = alt;

    [lat release];
    [lon release];
    [alt release];
}

- (void)locationManager:(CLLocationManager *)manager
       didFailWithError:(NSError *)error
{
    //定位失败

}
返回的一个CLLocation 类型包含常用的几种数据,经纬度,运动速率,海拔,方向等,我们可以按需要来获取。
二:用MapKit来显示
第一步就是添加一个mapView视图
然后也是很简单的几行代码即显示位置点。
对于将经纬度转化成友善的地理信息,首先我们来看个最传统的例子,既我们将获取的经纬度封装成一个网络请求到google的map服务,
返回对应的地址信息。
   latNum = [[NSNumber alloc] initWithFloat:lat];
   lonNum = [[NSNumber alloc] initWithFloat:lon];

    NSURL * aurl = [NSURL URLWithString:[NSString stringWithFormat:
                                         @"http://ditu.google.com/maps/geo?q=%@,%@&output=json&oe=utf8&hl=zh-CN&sensor=false",latNum,lonNum]];
    NSURLRequest *request = [[NSURLRequest alloc] initWithURL:aurl];
    self.connection1=[NSURLConnection connectionWithRequest:request delegate:self];
请求很简单,将经纬度放置进请求中。
上后上面就是一个传统的网络请求吧,
然后我们在NSURLConnection的代理方法中处理返回数据
- (void)connectionDidFinishLoading:(NSURLConnection *)connection
{
        NSString *jsonString = [[NSString alloc] initWithData:self.amutabledata encoding:NSUTF8StringEncoding];
        NSDictionary * jsonDic = [jsonString JSONValue];
        NSArray * jsonarr = [jsonDic objectForKey:@"Placemark"];

        NSDictionary *dic2 = [jsonarr objectAtIndex:0];
        NSString *name1 = [dic2 objectForKey:@"address"];
}
这边提下,googlemap服务请求可以以xml协议格式,也可以json协议格式。因为这边我用了json的,然后对于json的解析处理类用了SBJSON包。
具体你要解析出的内容你可以先在先将内容打印出来或是在浏览器请求后看下然后选择性解析。
然后是昨天在翻开发秘籍那本书,看到了关于这块的内容:逆向地理编码。
其实还是基于googlemap服务,只是IOS提供了一个简化的API,可供调用。
MKReverseGeocoder和他的一个代理类。原理基本和上面是一模一样。大家直接用下这两个类就明白了。
但是在ios5.0以上发现这几个类又被将之遗弃被新的CLGeocoder类代替并且去掉了代理类这一步。
    [CLGeocoder alloc] reverseGeocodeLocation:(CLLocation *) completionHandler:^(NSArray *placemarks, NSError *error)completionHandler
}
第一个参数我们都懂,第二个参数是个block对象,至于什么是block,详情就查看文档。
现在我们回到这段内容的最开始,即在一个视图上显示。
 MKCoordinateSpan span;
    span.latitudeDelta = 0.05;
    span.longitudeDelta = 0.05;
    //设置可调跨度,偏移量,越小越精确

    MKCoordinateRegion region ={self.coordinate,span};
    //确定一个屏幕坐标

    [self.mapKit setRegion:region];
    self.mapKit.showsUserLocation = YES;//当前位置显示小蓝点
在mapView显示的位置点是在视图的center点,确定这个点需要的两个参数,一个是经纬度,一个是跨度,其实说白越小越精确,越精确就是把视图放大放大~
反正还有很多细节的参数,在真正需要去设计这样一个应用时,再去慢慢调试。
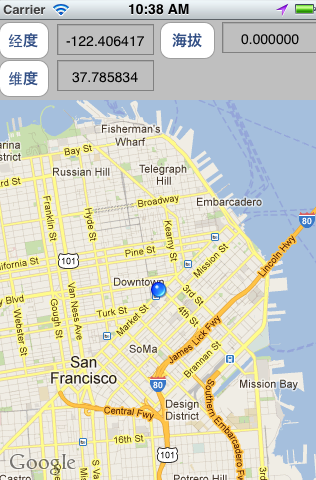
最后我们在看下如何在地图上创建一个大头针。
先看下效果图:

这就是一般说的注解,自定义一个大头针,实现一个MKAnnotation协议。
//
//  MyPin.h
//  MapKitTest
//
//  Created by Nono on 12-5-17.
//  Copyright (c) 2012年 NonoWithLilith. All rights reserved.
//

#import <Foundation/Foundation.h>
#import <MapKit/MapKit.h>
@interface MyPin : NSObject<MKAnnotation>

- (id)initWithCoordinate2D:(CLLocationCoordinate2D)dinate
                    tittle:(NSString*)title subtitle:(NSString*)subtitle;

@end
//
//  MyPin.m
//  MapKitTest
//
//  Created by Nono on 12-5-17.
//  Copyright (c) 2012年 NonoWithLilith. All rights reserved.
//

#import "MyPin.h"


@implementation MyPin
@synthesize coordinate;
@synthesize title = _title;
@synthesize subtitle = _subtitle;
- (id)initWithCoordinate2D:(CLLocationCoordinate2D)dinate
                    tittle:(NSString*)title subtitle:(NSString*)subtitle
{
    if(self = [super init])
    {
        _title = title;
        _subtitle=subtitle;
        coordinate = dinate;
    }
    return self;
}

- (void)dealloc
{
    [self.title release];
    [self.subtitle release];
    [super dealloc];
}
@end
 CLLocationCoordinate2D anndiante;
    //为了显示比较清晰不和定位点重叠
    anndiante.latitude = self.coordinate.latitude + 0.0011;
    anndiante.longitude = self.coordinate.longitude + 0.0012;
    MyPin *pin = [[MyPin alloc] initWithCoordinate2D:anndiante tittle:@"测试title" subtitle:@"测试子title"];
    [self.mapKit addAnnotation:pin];
    [pin release];
当然对于跳出视图你可以做更多的添加以及视图自定义。
针对于Core Location和MapKit的编程基础就是这些。因为其实我的下一个项目中并不需要用到,也不做太对深入,
其实开发秘籍这本书上的细节对这块描述还有很多。看来这本熟当做以后的参考书还是不错的。
分享到:


相关推荐
IOS MapKit应用
iOS5地图使用MapKit,使用CLGeocoder解析,原来的MKReverseGeocoder过时不可用
ios纯代码实现.用CLLocation与mapkit实现定位与方位搜索的功能。若有不足之处欢迎大家评论指出~
学习demo 博文链接:https://justsee.iteye.com/blog/1770094
mapKit
它使用Mapkit JS,并且仅是一个演示-尚未准备好投入生产。 这里有一篇博客文章,解释了Mapkit JS的工作方式: ://mattrad.uk/embedding-apple-map-wordpress/。 内容 WordPress插件包含以下文件: README.md 。 ...
K-Means-Mapkit(K-Means)该存储库包括MapKit库中KMeans算法的用法用法(用法) 按住地图以获取积分点击计算按钮。 计算完成后,这些点将以不同的颜色聚类。关于(关于) YTU Map Engineering是“空间统计”博士...
iOS 9 MapKit 地图 导航新增功能
map 中使用location定位,mapkit和core location的使用,地理编码和地理反编码
mapkit地图定位,自己编辑当前的位置
iOS7 is probably the most significant change to Apple's mobile operating system since the launch of the iPhone3G. Not only does it completely revamp the UI, but it also introduces loads of really ...
不推荐使用并删除它。 有一个名为的自定义库,可使用Geocoder API实现类似的功能。 它的价格昂贵。 Yandex Place Picker利用Yandex MapKit为您提供相同的功能。 免费。 关键区别 可以使用图标,但是Google的图标...
MapKit地图的使用技巧。
高级注释动画快速而肮脏的 MapKit 动画注释测试。
Xcode4开发基础教程,ios5 Chapter 1: Before We Get Started Chapter 2: Blast-Off! Chapter 3: Keep on Truckin’ Chapter 4: Buttons & Labels with Multiple Graphics Chapter 5: Touches Chapter 6: ...
77. Getting Location Information using the iOS 10 Core Location Framework 78. An Example iOS 10 Location Application 79. Working with Maps on iOS 10 with MapKit and the MKMapView Class 80. Working ...
使用Swift将MKPolyLine叠加层添加到iOS MapKit地图 移动用户喜欢的功能之一是查看在地图表面上直接传达的信息。 当将天气,行车路线和客户位置叠加在地图上时,会更加详细地进行说明。 在本文中,我将逐步介绍使用...
Building location-aware iOS applications utilizing Core Location and MapKit Localizing applications for international use Creating applications that capture audio and play media Storing data in files ...
第2章 Core Location、MapKit和Geofencing框架 13 第3章 排行榜 47 第4章 成就系统 73 第5章 Address Book框架初步 93 第6章 Music Libraries框架 109 第7章 实现HealthKit框架 125 第8章 实现HomeKit框架 139 第9章...
IOS应用源码之Apple的MapKit相关官方Sample三个送上WeatherMap.zip