之前之前用R4,现在一下就跳到用R7了,ANDROID4.0出来过后,应该有不少热机友敢望资疗吧,OK,在网上偶尔浏览的时候,看到有很多初学者希望了解在ANDROID中NDK应用的开发,不知道它是怎么开发与运行的,今天我就简单来图解一个HelloWorld的简单实列吧,以好供初学者做给力的参考,OK,不废话了,直入正题吧:
首先,我们得配置环境,当然这是在你本来就有SDK开发环境的情况下,请去官方下个NDK吧:http://www.android.com.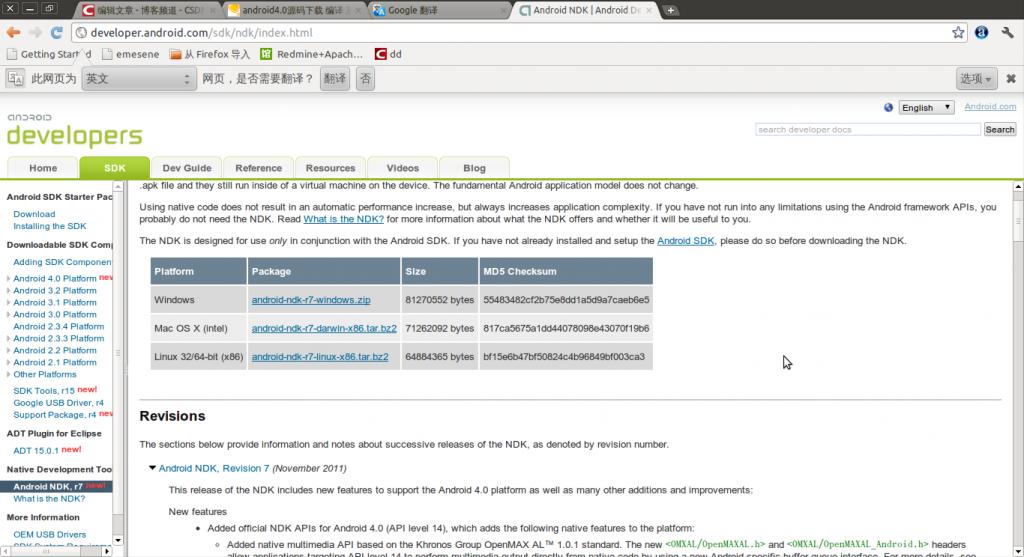 ,最新版本为android-ndk-r7-linux-x86.tar.bz2,即R7,我一直用的是LINUX,所以我下的是LINUX版本,如果你是WINDOWS或者MAC的话,你自己看着办吧,OK,下下来后,解压在你自己认为可以放的地方就行了,看目录:
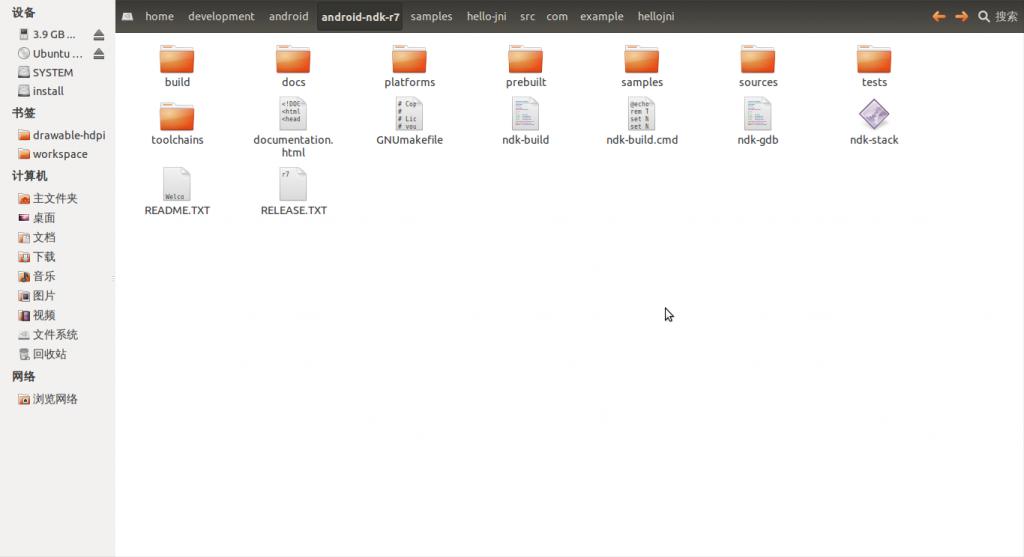 ,以上为解压后的R7目录,先别急新建项目开发,先配置NDK环境:打开终端,输入命令:sudo
vim ~/.baserc,打开后根据下面图,填入下下来的NDK目录路径:
,以上为解压后的R7目录,先别急新建项目开发,先配置NDK环境:打开终端,输入命令:sudo
vim ~/.baserc,打开后根据下面图,填入下下来的NDK目录路径:
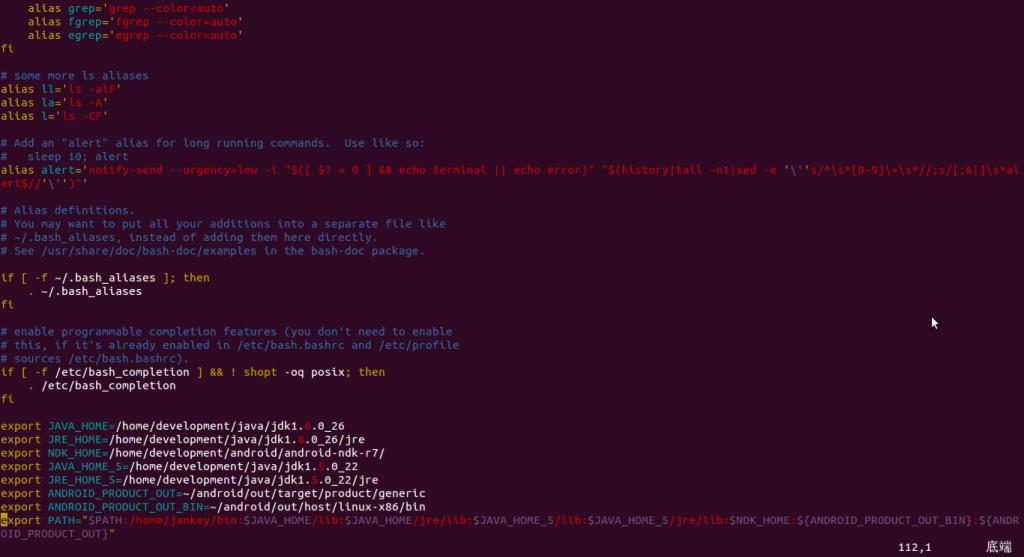 在图中可以看到有这行:export NDK_HOME=/home/development/android/android-ndk-r7/
即为NDK所需配置的环境路径。保存后,输入: source ~/.baserc 来使其配置立即生效,OK后,咋们来新创建一个项目,为jni_demo,下面我需要看当前那个目录截图,你会发现目录中有一个sample目录,里面就是其本身已有的列子,在这里我得提醒各位,不敢你遇到任何新的语言,先看它的Hello World列子,不要急于误打误撞的敲代码,先看清楚它的列子的运行效果,OK,在这里我们就以hello-jni这个列子来验证吧,打开这个目录:
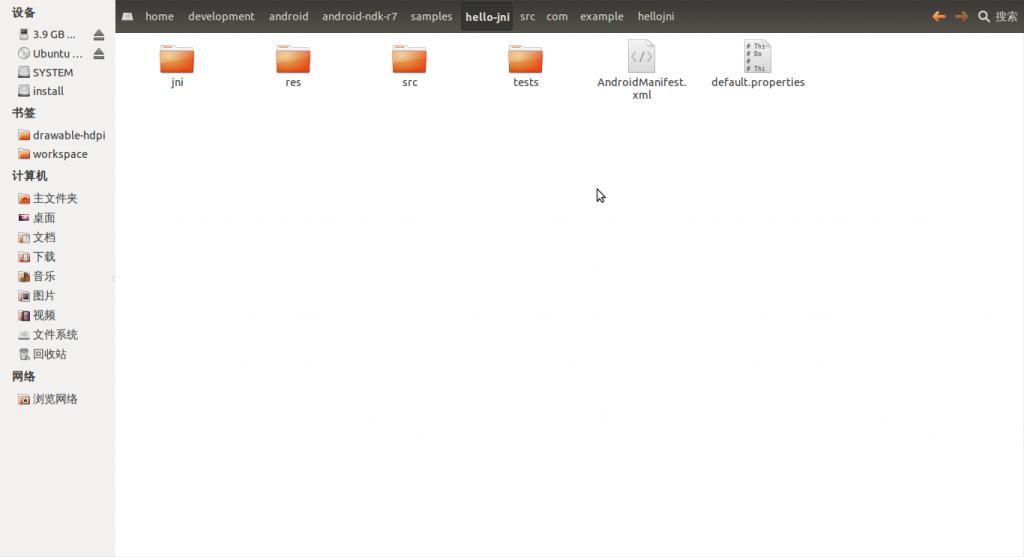 可看到有四个目录,一个是JNI为C~比源码处,一个是APP的RES,一个SRC为JAVA源代码,再一个就是测试目录,另外两个文件就不在这里说了,我们新建了项目后,需要写JNI代码与JAVA代码,所以在这里,我就直接把这里的jni里面的代码拷贝到我的项目中去,记得在自己的项目中需要新建一个jni文件,其拷贝的两个文件分别是:Android.mk与hello-jni.c,其Android.mk文件内容是:
# Copyright (C) 2009 The Android Open Source Project
#
# Licensed under the Apache License, Version 2.0 (the "License");
# you may not use this file except in compliance with the License.
# You may obtain a copy of the License at
#
# http://www.apache.org/licenses/LICENSE-2.0
#
# Unless required by applicable law or agreed to in writing, software
# distributed under the License is distributed on an "AS IS" BASIS,
# WITHOUT WARRANTIES OR CONDITIONS OF ANY KIND, either express or implied.
# See the License for the specific language governing permissions and
# limitations under the License.
#
LOCAL_PATH := $(call my-dir)
include $(CLEAR_VARS)
LOCAL_MODULE := hello-jni
LOCAL_SRC_FILES := hello-jni.c
include $(BUILD_SHARED_LIBRARY)
hello-jni.c文件的内容为:
/*
* Copyright (C) 2009 The Android Open Source Project
*
* Licensed under the Apache License, Version 2.0 (the "License");
* you may not use this file except in compliance with the License.
* You may obtain a copy of the License at
*
* http://www.apache.org/licenses/LICENSE-2.0
*
* Unless required by applicable law or agreed to in writing, software
* distributed under the License is distributed on an "AS IS" BASIS,
* WITHOUT WARRANTIES OR CONDITIONS OF ANY KIND, either express or implied.
* See the License for the specific language governing permissions and
* limitations under the License.
*
*/
#include <string.h>
#include <jni.h>
/* This is a trivial JNI example where we use a native method
* to return a new VM String. See the corresponding Java source
* file located at:
*
* apps/samples/hello-jni/project/src/com/example/HelloJni/HelloJni.java
*/
jstring
Java_com_jsd_jni_demo_JsdJniActivity_getJniDatas( JNIEnv* env,
jobject thiz )
{
return (*env)->NewStringUTF(env, "This is for Datas from JNI !");
}
注意观察红色字体,其为项目目录路径地址,根据自己实际项目目录来定,
好了,在新建ACTIVITY类中:
package com.jsd.jni.demo;
import android.app.Activity;
import android.os.Bundle;
import android.view.View;
import android.view.View.OnClickListener;
import android.widget.Button;
import android.widget.TextView;
/**
*
* @author jankey
*
*/
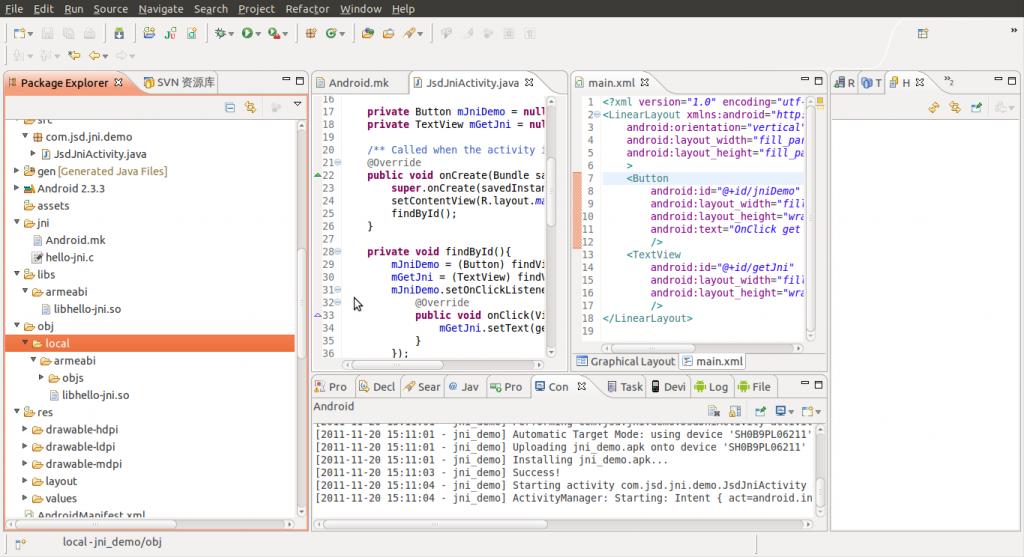
public class JsdJniActivity extends Activity {
private Button mJniDemo = null;
private TextView mGetJni = null;
/** Called when the activity is first created. */
@Override
public void onCreate(Bundle savedInstanceState) {
super.onCreate(savedInstanceState);
setContentView(R.layout.main);
findById();
}
private void findById(){
mJniDemo = (Button) findViewById(R.id.jniDemo);
mGetJni = (TextView) findViewById(R.id.getJni);
mJniDemo.setOnClickListener(new OnClickListener() {
@Override
public void onClick(View v) {
mGetJni.setText(getJniDatas());
}
});
}
/**
* A native method that is implemented by the
* 'hello-jni' native library, which is packaged
* with this application.
* @return
*/
public native String getJniDatas();
/**
*This is another native method declaration that is *not*
* implemented by 'hello-jni'. This is simply to show that
* you can declare as many native methods in your Java code
* as you want, their implementation is searched in the
* currently loaded native libraries only the first time
* you call them.
*
* Trying to call this function will result in a
* java.lang.UnsatisfiedLinkError exception !
* @return
*/
public native String unimplementedGetJniDatas();
/**
* this is used to load the 'hello-jni' library on application
* startup. The library has already been unpacked into
* /data/data/com.example.HelloJni/lib/libhello-jni.so at
* installation time by the package manager.
*/
static{
System.loadLibrary("hello-jni");
}
}
上面有注释,其native方法为JNI需要调用与执行的方法,
在布局里就添加了一个按钮与一个文本,使用按钮单点后来获得文本显示的字符为JNI所得来的数据,其实这个过程很简单,基本就是NDK里面本身的列子般过来运行一样,等这都完了,先不要急于运行,你需要先把C文件进行编译后才能执行运行APP,在命令行进入其目录的JNI目录,使用ndk-build命令来构建编译:
 你会看到:jankey@jankey-ThinkPad-Edge:~/workspace/jni_demo/jni$ ndk-build
Compile thumb : hello-jni <= hello-jni.c
SharedLibrary : libhello-jni.so
Install : libhello-jni.so => libs/armeabi/libhello-jni.so,生成了两个文件目录:
 即两个.so为后缀的文件,在这里基本就没什么问题了,这样就建立了C与JAVA通信的一个过程,OK,使用CTRI+F11开始运行其APP:
 ,先我们可以单击来获取JNI返回回来的数据了:

这就把数据给调出来了,如果你是初学者,你还等什么呢,赶快动手吧,希望这能给在入门里做最给里的参考,谢谢,有时间,我会继续慢慢的写一些深入的内容,可敬请期待
分享到:


相关推荐
ANDROID4.0 R7最新的JNI源码
编译好的Android JNI HelloWorld,测试开发环境是否搭建成功
android jni helloworld
Android下JNI的HelloWorld示例,内含Trace方法和内部及外部类的构造函数调用方法。
Android_JNI_HelloWorld,实现了简单的jni操作实例。放在external目录下,mm即可。
android jni helloworld DEMO
JNI入门学习第一篇:HelloWorld,主要是介绍操作步骤。
Java JNI 简单介绍 HelloWorld 博客中的代码 http://blog.csdn.net/u011642663/article/details/49509633
《细说Android4.0NDK编程》由王家林所著,通过NDK,应用程序可以非常方便地实现Java与C/C++代码的相互沟通。本书顺应Android软/硬件、云计算整合潮流,... 《细说Android4.0NDK编程》适合从事Android开发的人员阅读。
参考百度百科的入门demo,并对本机运行时出现的错误进行描述,相关的解决办法也注明了出外。下载后请先行阅读readme.txt
Android_JNI_Helloworld Android Studio的安装项目以使用NDK 创建一个Android项目 添加ndk目录: ndk.dir = / pathTo / Android / ndk 使用Android Studio模板添加JNI文件夹 右键单击项目名称(应用程序)->新建->...
Stuido中使用JNI例子HelloWorld,带制作so文件,并在别的项目中调用
return(*env)->NewStringUTF(env, "Hello World from JNI !"); } JNIEXPORT jdouble JNICALL Java_com_xxx_hello_HelloJni_add(JNIEnv *env, jobject obj, jdouble a, jdouble b) { return a + b; } JNIEXPORT ...
Android 简单的JNI开发实例demo源码
Eclipse + vs2013 编写第一个JNI HelloWorld, Java 通过JNI调用C ,通过VS2010生成 dll库,来通过Java调用
使用Android Studio + NDK进行JNI开发,博客中有详尽说明,可以参考 http://blog.csdn.net/u014316982/article/details/53081597
总结了Android下jni开发的一些重要知识点,并且以代码的形式提供供大家参考
Android NDK JNI 经典实例Android NDK JNI 经典实例Android NDK JNI 经典实例Android NDK JNI 经典实例Android NDK JNI 经典实例Android NDK JNI 经典实例Android NDK JNI 经典实例
一个简单的android JNI 开发范例. 可以做入门学习之用
JNI和NDK的关系:在Android开发环境中,JNI是实现的目的,NDK是实现JNI的手段,即通过NDK实现JNI功能